Progression with my models has been pretty smooth apart from
a few hiccups. I had completed three models so far and are planning on creating
a few more, but because I am behind on my map design, I will most likely have
to do these much later. Hopefully by using the models I have created and the assets
available in UDK will make the map look and feel more realistic, as it is
currently very empty and plain.
Sunday, 5 May 2013
Project Production (Week 4)
The first few days of week 4 I was mostly concentrating on
my models and trying to get them finished.so I could put them into my map. It
took me awhile to finish the models because I encountered a few issues when
creating them. But once I had overcome these problems I set about creating my
map in UDK. I encountered a problem when I was trying to import the prison cell
door model into UDK. When I imported the model into the engine, only part of
the model could be seen and when I tried to create a collision for the model, I
was unable to for some strange reason. I wasted a lot of time trying to
overcome this with no success. I ended up using a model from the content
browser instead. When I have a chance I will
try and come back and fix the problem but because I am slightly behind I decided
just to carry on for now and use the other model for the time being.

Monday, 29 April 2013
Modelling (Week 3-4)
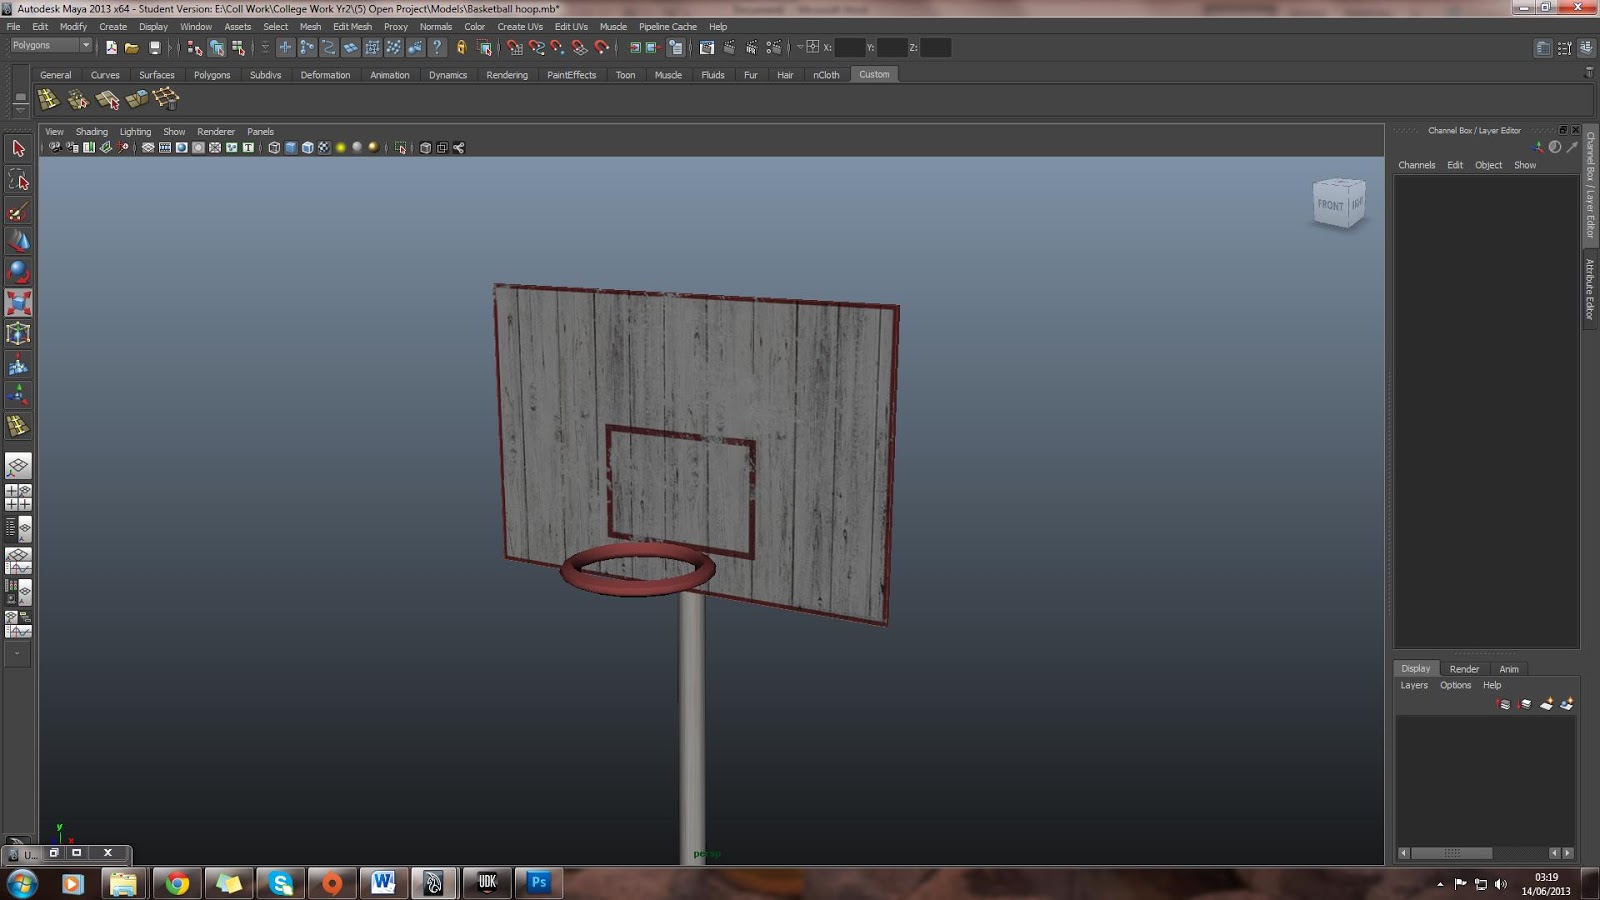
Because UDK has a very limited array of assets, I decide to create a few models in Maya which I would need for my map, a few examples are:


 This model was the easiest to create, as it was simple comprised of just a cylinder, cube and a pipe. All i did was modify the dimensions of each shape and positioned them to form the model u can you see here. I then Edited the UV's and textured it using images I found on the internet.

 Here is the Model of a bench. This model was really easy to
do at it was just two cubes. With the first cube I simple extruded it and
modified to make the metal from which will hold up the wooden planks. The other
cube was then modified into a plank shape and I then simple duplicated the
plank five times and positioned them in relation to the metal frame. Once I had
the shape right i them using a simple wood and metal texture which u can see
above here.
Here is the Model of a bench. This model was really easy to
do at it was just two cubes. With the first cube I simple extruded it and
modified to make the metal from which will hold up the wooden planks. The other
cube was then modified into a plank shape and I then simple duplicated the
plank five times and positioned them in relation to the metal frame. Once I had
the shape right i them using a simple wood and metal texture which u can see
above here.
- Prison Cell Door
- Basketball Hoop
- Bleachers (Bench)
- Table


Here are the screenshot for the prison cell door which I
created in Maya. This model was fairly easy to create. It is composed of a
simple cube which had manipulated to make the basic frame shape. For the bars I used
basic cylinder and changed the shapes properties to make a long skinny cylinder
for the bars, I then duplicated the cylinder multiple times and positioned them
at equal intervals. I also used a simple cylinder to make the hinges as well. The
only problem I encountered was when I was creating the key hole but I overcame
that by simple working at it, but it did take me a while to finish it. After I had
completed the model I then applied a basic metal texture to the whole model to
finish it off.



Sunday, 28 April 2013
Project Production (Week 3)
During this week I started developing my map in UDK. At first
production was very slow due to the fact that I had not used UDK in a good few
months, but after re-familiarising myself with the software my map gradually
began to take form. I did come across a few problems because I had either forgotten
a process or how to use a specific tool or feature, for example I had forgotten
how to texture the terrain using the terrain tool. But these issues were easily
overcome from the help of peers and tutorials from YouTube.
I also started creating a few models which would be used in
my map. I started modelling a prison canteen table, prison cell gate, bleachers
and a basketball hoop. These were fairly simple and easy to create, but took up
a lot of my time because I wanted to get them finished and ready to be implemented
into my map. I tried to finish these as quickly as I could but by the end of
the week I had still not finished them meaning I was behind already, to try and overcome this I used the weekend to
get them near finished and ready for texturing.
Friday, 19 April 2013
Map Desiging (Week 2)
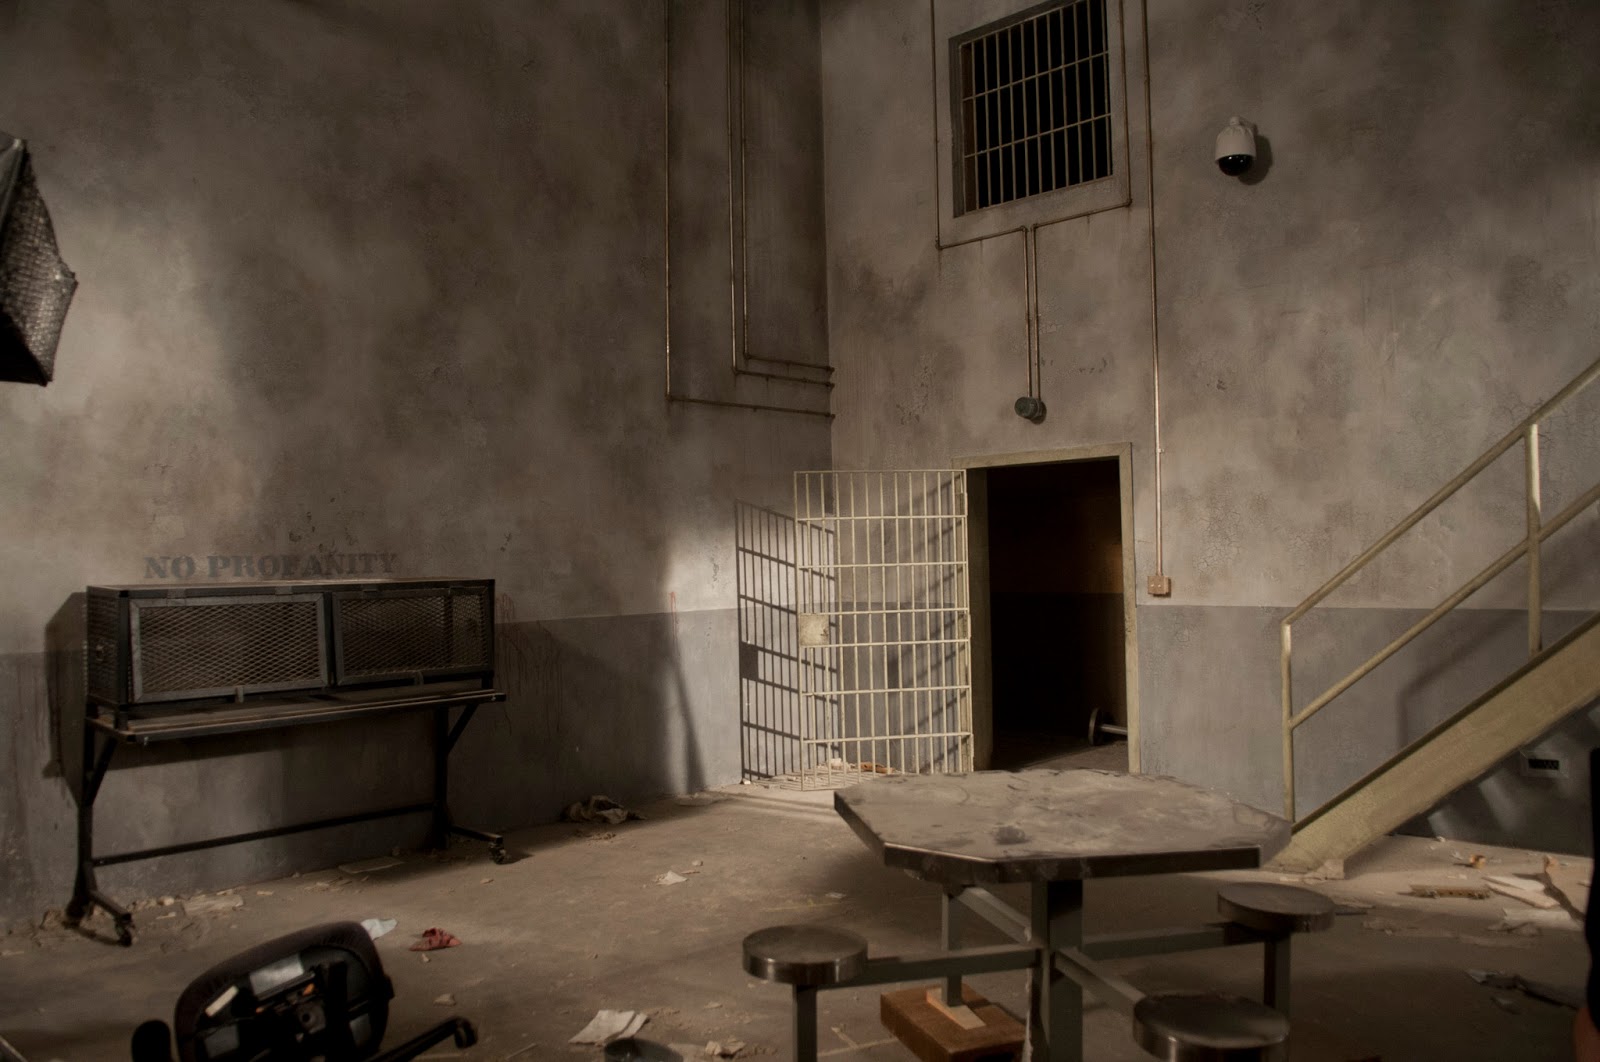
I decided to make my map based on the prison from the TV series "The Walking Dead". I first gathered a variety of different reference images, some which were of the set from the show and others from actual prisons. By using these different images I was able to sketch out a few basic plans for my map.


Because I had a lot of reference I was able to come up with two basic plans for the map, to make the map easily recognizable i decide to base the map primarily on the show, as this one would be more well known and familiar, the first sketch is more accurate to the show and the second had hints of both the show and the comics. I decided to go with the one more accurate to the show, as this one would be easier for players to recognize and identify as.The purpose of these sketches is just to layout the map and position were each building will go. This will help me when creating the map in UDK.


Because I had a lot of reference I was able to come up with two basic plans for the map, to make the map easily recognizable i decide to base the map primarily on the show, as this one would be more well known and familiar, the first sketch is more accurate to the show and the second had hints of both the show and the comics. I decided to go with the one more accurate to the show, as this one would be easier for players to recognize and identify as.The purpose of these sketches is just to layout the map and position were each building will go. This will help me when creating the map in UDK.
Wednesday, 17 April 2013
Research and Reference (Week Two)
In week two I will be primarily designing and planning out my map. I
first started out by collecting a variety of different reference images that
would aid me in the creation of my prison map.
These images proved very helpful when designing and creating my map.
these images helped me get the little things right, like the number of
windows, as well as the proportions and sizes of the buildings.




Saturday, 13 April 2013
Project Launch (Week 1)
In our project launch we were briefed on that our final
project will entail. We were told that we would have total freedom with this
project and that we get to decide what kind of thing we would be doing for the
next 6 weeks there were, however there were a few things which we would have to
do to cover the last two units, Unit 4 and 5. These included creating our own
personal brief and project management e.g. creating a timetable and tracking
our progress.

Too decided what I would do for this project I created a small spider diagram which you can see above here. This spider diagram details the different subjects, software, and work I could create for this project. I really struggled at deciding what to do, because I wasn’t sure whether to create a 3D model or create a map in UDK. I finally decided to create a map because I thought creating a map would be the best way of showing off my skills. After deciding this I then had to come up with an idea for my map, and the first thing that came to mind was a TV show called “The Walking Dead”. This gave me the great idea of creating a map based on the Prison in the TV show. I thought that by creating this map it would give players the opportunity to step into and explore the world.
The brief was fairly easy to do as we were given a template by our tutors. This template contained most of the information already and all I had to do was personalize it to my own personal project. To track and manage our work we were told to keep a log of our progression throughout our project either by use of a timetable or some other means.In the brief there was also a basic timetable, on the last page. I used this to detail what I would be doing each week and what I hoped to achieve at the end of each week. Once I had finished the brief I then uploaded it to Moodle to be marked.
To track my work even further, I also used Google Calender to make a day by day timetable, which will detail when I start and finish a specific task. Hopefully by following the calender and the timetable I will hopefully be able to manage my time effectively to complete all work before the deadline.


Too decided what I would do for this project I created a small spider diagram which you can see above here. This spider diagram details the different subjects, software, and work I could create for this project. I really struggled at deciding what to do, because I wasn’t sure whether to create a 3D model or create a map in UDK. I finally decided to create a map because I thought creating a map would be the best way of showing off my skills. After deciding this I then had to come up with an idea for my map, and the first thing that came to mind was a TV show called “The Walking Dead”. This gave me the great idea of creating a map based on the Prison in the TV show. I thought that by creating this map it would give players the opportunity to step into and explore the world.
The brief was fairly easy to do as we were given a template by our tutors. This template contained most of the information already and all I had to do was personalize it to my own personal project. To track and manage our work we were told to keep a log of our progression throughout our project either by use of a timetable or some other means.In the brief there was also a basic timetable, on the last page. I used this to detail what I would be doing each week and what I hoped to achieve at the end of each week. Once I had finished the brief I then uploaded it to Moodle to be marked.
To track my work even further, I also used Google Calender to make a day by day timetable, which will detail when I start and finish a specific task. Hopefully by following the calender and the timetable I will hopefully be able to manage my time effectively to complete all work before the deadline.


Monday, 18 March 2013
2D Game Assets
Here are images of the various different assets I created for the 2D game i decided to make them as simple as possible and stuck with a very cartoonist style. This art style really fit in well into the game world and was very similar to the art style of the characters that Musa had created.
 Here is a basic cage which would be the starting point of our character on each level, this helps portray that our character is in a Zoo and he is trying to escape from his prison.


.jpg)
.jpg)


Here is a post I created which can be used to hold up the various platforms so that they are not just floating in mid air. Because we have falling platforms we could use this post to suggest whether the platform is stable or not.
.jpg)

Because our level is set in a Gorilla enclosure I though I would create this swing rope to make the game feel more realistic. This Rope can also aid our charecter it getting from place to place. But to make these much harder, the swinging speed and distant may vary making it more engaging and challenging.
 And here is a basic portal which i created as just a mess around to play with the animation features in Photoshop. With this asset I created a basic 2 frame animation to make the asset more dynamic instead of being stiff and boring.


.jpg)
.jpg)


Here are a variety of different platforms which would be placed throughout the game. If you look closely at many games today you will notice that the same assets has been used multiple times, however each duplicate might be slightly different. This is method can save a lot of time when creating a game, so I decided to adopt the same technique and created multiple versions of the same asset as you can see here. Each of these assets can also be flipped and rotated to make it look more unique.

Here is a post I created which can be used to hold up the various platforms so that they are not just floating in mid air. Because we have falling platforms we could use this post to suggest whether the platform is stable or not.
.jpg)
To ad more depth to our game we decided to add multiple levels to map so the character has the opportunity to explore a larger world. To a accompany this I decided to create a basic ladder which would aid the charecter in going higher or lower. Also with this asset if it is flipped and rotated can be layered to make the ladder longer making it a very useful asset for the game.

Because our level is set in a Gorilla enclosure I though I would create this swing rope to make the game feel more realistic. This Rope can also aid our charecter it getting from place to place. But to make these much harder, the swinging speed and distant may vary making it more engaging and challenging.

Subscribe to:
Posts (Atom)